Photography Friday: Settings
"What in the world do all these buttons do????"
There are a lot of buttons and dials, aren't there? Fun! I think it is super important to know what your camera can do so you will have all the power possible to create the images you desire. Grab your camera and have a seat... this is a lengthy post. I feel like I'm writing a book! But there are so many great books out there already that explain and know much more than I do so I'll refrain. But you can print all this out and take it with you when you practice. Because you are practicing, right??? Go get your camera, already! Hold it as you read and play as you read so you get the hands on learning thing going on. I'll wait for you. Go, lazy!
First off, it's good to understand how your camera works. At least to a certain degree. I'm going to be super basic for those of you who don't really care for the technicalities and just want to understand enough to work your camera.
When you click to take a picture, your shutter opens up and the light from the scene burns an image onto your film. In this digital world, it "burns" an image onto your sensor. The amount of light that hits the sensor will determine what shows up in your picture. So if you are taking a picture in a low-light situation, your camera will use a flash or your image will be blurry due to motion. Know what I'm talking about? Now we'll talk about why...
Shutter - This is the little "door" that opens and closes. Your film/sensor is in darkness just waiting for light to burn onto it and create an image. When the shutter opens, light is flooded in and burns your image. If your shutter is open for a long time, more light is flooded in and the brighter the image. Too long and the image is too bright. Too short and the image is too dark. In Auto mode, the camera chooses how long the shutter should stay open to get the best image. In Shutter Priority mode ("Tv" on Canon cameras), you choose the shutter speed and the camera balances out the other settings to get the best image. In Aperture Priority ("Av" on Canons), you choose the Aperture and the camera chooses the shutter speed to get the best images. In the middle of a bright sunny day, your shutter speed will be really fast because there is plenty of light and it doesn't take long to burn your image correctly. In low-light situations (ex: indoors), your shutter needs to stay open longer to gather enough light in to burn your image. However, the longer the shutter is open, the more time the subject has to move and hence a blurry image. Unless you use flash. More on that later...
Aperture - This is how big the opening of your shutter is. This also determines how much light gets in. The shutter is a funky shaped "door" (reminds me of those futuristic space movies) and the size of the opening can be altered by choosing an aperture. Here is an example:
 Pretend your shutter starts wide open. You will need to close it a bit to get the correct exposure (properly lit image). Apertures are also referred to as F Numbers (F#). When choosing an aperture, you might say you are choosing a certain f# such as f/4. As you can see, a large aperture like f/16 is a really small opening. You are closing the opening that much. If you close the aperture just a little bit like f/2.8, you still have a fairly large opening. Obviously, the larger opening will let in more light with each click, right? Lenses that offer wide apertures, such as 2.8, are considered fast lenses because your shutter can click faster since more light is getting in with each click.
So why don't they just make the shutter wide open so you always get good light? The aperture also gives you a creative edge. Or so I look at it this way. This is one of my fave things to control. I like to control a lot of things. lol The aperture also controls how much is in focus. I wear contacts and without them, I cannot read the clock across the room at night. Someone once showed me a trick many years ago and it worked amazingly well even though I didn't understand it. I made an "OK" sign with my hand and made the opening really small so it was barely big enough to peek through. BARELY. Like really tiny. Somehow, when I looked through this, I was able to see the clock perfectly clearly. I still don't completely understand it but it works so just trust me! lol When the aperture is large (door closed a big amount), the opening gets smaller and more is in focus. So if you are shooting a landscape, you probably want a lot to be in focus so you would want a higher f# (smaller opening). When shooting people or certain objects, I like just a tiny bit to be in focus, so I prefer to choose a wider aperture (opening) and so I choose a smaller F# such as 2.8 or so. This gives you that wonderful background blur that is so yummy. =)
Clear as mud? Don't worry, it took me a while to grasp this completely and I just kept reading and re-reading and playing with my camera until it clicked. Sorry, no pun intended. Maybe. So remember:
Small opening = high f# = more in focus.
Wide opening = low f# = less in focus.
ISO - Remember the film speed back in the days when we used film? 100 speed was good for outdoors, 400 good for indoors... or so it said on the box. I just followed the box suggestions because I had no idea what it all meant back then! Basically, the ISO is one way to get light in your camera to your sensor. The higher the ISO, the more light comes in with each click of the shutter. I'm trying to think of the best way to describe how this is different from aperture or shutter speed... ??? I guess you can think of it as your film (sensor) is more susceptible to the light. Like maybe the higher the ISO, the more easily it absorbs the light. So on a bright sunny day where there is a lot of light, a low ISO will be sufficient. But in a dark situation, you will need a high ISO so light aborbs faster to the film (sensor) and then you can use a faster shutter speed. I'm sure this is not correct terminology or process but hoepfully you'll understand the concept! High ISO = more light let in. This will allow you to use a faster SS (Shutter speed) or a higher aperture (small opening, more in focus). The downside to a higher ISO is that the higher the ISO, the grainier the images start to get. Sometimes it is not so noticeable, other times it is really noticeable. Sometimes I don't notice, sometimes I like it, other times I hate it with a passion. lol I usually prefer nice, clear, sharp images. Oh, and just so you know, "grain" is "noise" and it's the speckly looking texture your image gets. Like old B&W film. Usually it's not a big deal if you're just printing pics up to scrapbook or 4x6 prints. But it's much more noticeable when you enlarge the print. However, typically, you want your ISO to be as low as you can keep it and still get a good image from your SS and Ap (shutter speed and aperture).Are you catching the triangle? Shutter Speed, Aperture and ISO. They all allow light to come in to your sensor. However, they do them in different ways and that gives you some creative control. There is not just one combination of the three to give you a correct exposure (properly lit up image). It is a balancing act between the three. In Auto modes, you camera balances them for you and chooses what it thinks will be best for the image "it" sees. You may want something else and so you have the other modes to play with where you get to control the settings. Av and Tv allow you to control one component while the camera does the rest - but you still choose the ISO in these two creative modes. Manual (M) gives you complete control of it all: ISO, Ap and SS. So if it's bad, it's all your fault. No pressure. =)
Ok, have I thoroughly confused you all? Good. Now I feel normal! I was confused for a while but stubborn enough to hang in there and keep at it. And, I still take awful pictures. I just don't show you those! lol This was a very rough run through of these settings. I know I probably missed some stuff so if you have any questions or corrections - please let me know! It's a quick crash course. If you want to go deeper, tell me and I'll do that one week.
Here is your homework: Study the following images. I included the settings so you can compare them. After studying them and the differences between them, go shoot some stuff with your own camera and see how it all works. And don't worry if it's something pretty or your unwilling victims... er, I mean "kids"... I shot thousands of shots of my kids toys while I learned. Those subjects stand still and don't require M&M bribes. =)
In honor of the first day of spring, I went outside and shot some springy looking stuff! Then shot in my living room so you could see low light too. These are SOOC (Straight out of the camera) I did no editing, just resized to fit here on the ol' blog. So you get some not-so-exciting samples! Enjoy! lol
A. ISO 100, SS 1/5000, f/1.8 (See the nice blurry background? Yummy! It's that f/1.8 that made it so creamy. Notice that even the leaves pointing out towards me are not in focus, I focused on the bulb thingies and the slice of focus is really shallow.)
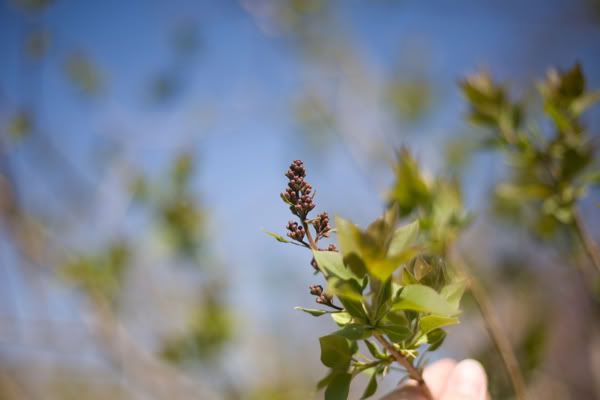
B. ISO 400, SS 1/8000, f/1.8 (changed the ISO, it added more light so I had to raise my SS to keep up... still too much light!)
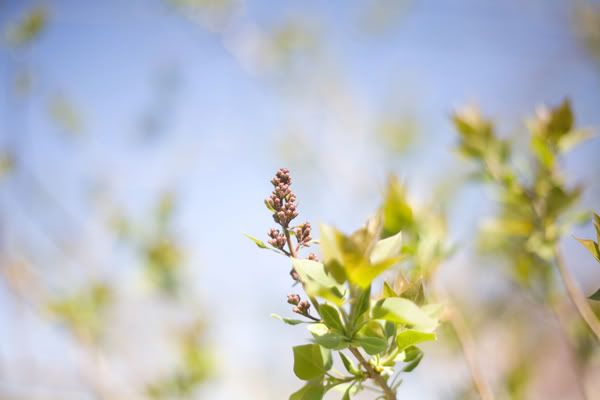
C. ISO 100, SS 1/60, f/22 (Raised the f# which made the image darker so I had to slow down my SS to keep up. See how the higher f# made more in focus. I shot the exact same thing in each of these three images.)
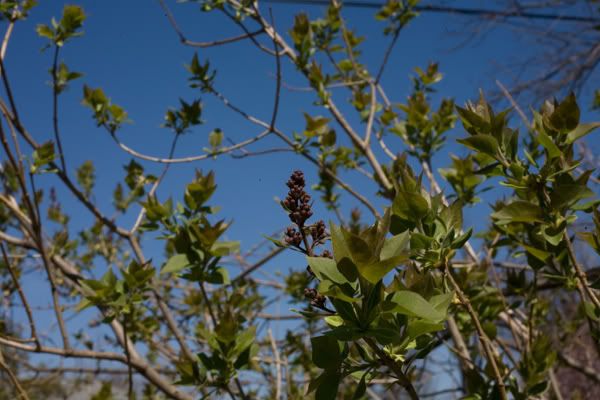
D. ISO 100, SS 1/60, f/1.8 (He was nice and still so I wasn't too worried about such a slow SS and was able to get my f# down to 1.8 to add enough light for a good exposure. Bonus: the background junk is blurry and not distracting)

E. ISO 100, SS 1/10, F/3.2 (You can see that he got moving and a slow SS cause me to get a blurry image although it is properly exposed.)
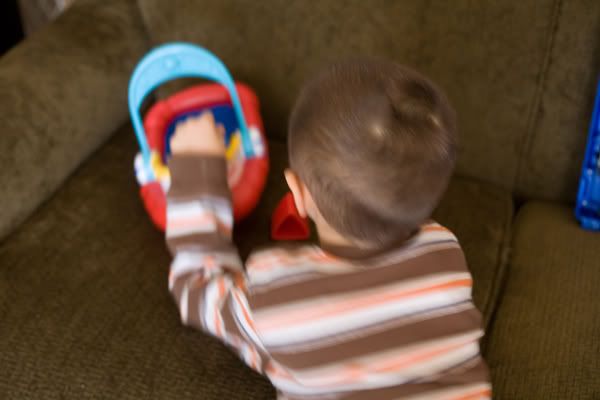
F. ISO 400, SS 1/125, f/1.8 (Raised my ISO to allow more light so I could use a faster SS to freeze this quick little booger of a boy, can you tell he's ready for me to sell my camera? lol)
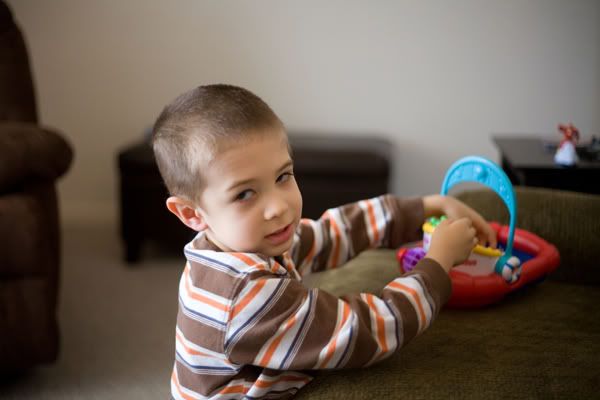
G. ISO 400, SS 1/125, f/1.8 (Another example of a nice blurry background due to the wide open aperture)
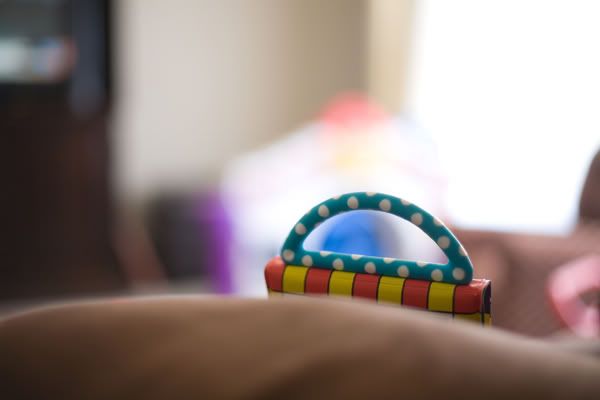
H. ISO 400, SS 1/13, f/8.0 (Rasied the f# to get more in focus and that made things dark so I had to lower my SS. Good thing it is not a moving subject!)

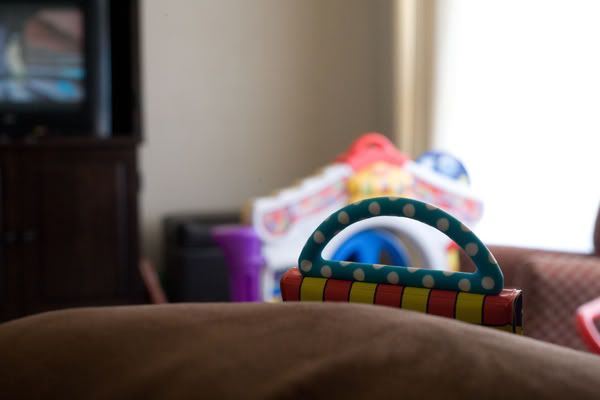
I. ISO 1600, SS 1/60, f/8.0 (Raised the ISO so I could get a faster SS and keep up with the high aperture. It's difficult to hand hold at SS slower than 1/60)
Hope this helped someone! See you next week!
