
Photography Friday: Layers & Textures
"Layers" in photoshop can be a little confusing at first but it really isn't so complicated at all.
Grab three sheets of paper and write a letter of the alphabet, one on each sheet. Stack the papers in front of you and tada! You have three layers. The cool thing about Photoshop is that you can manipulate these layers and do some cool stuff!
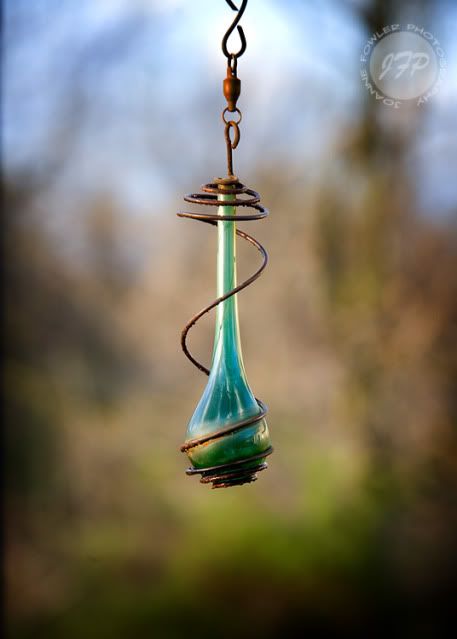
For example, here is an image I took a while back that was just ok...
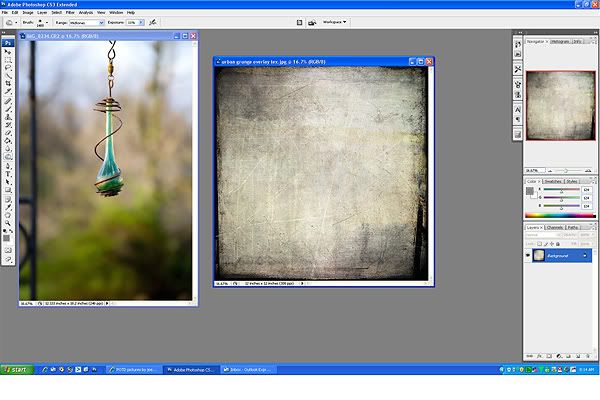
So I brought it into photoshop and decided I wanted to add some texture to it. I also pulled up a texture image. You can get these anywhere and make your own. This particular one came from LCH Designs because I think she's awesome!
So I pull up both images...
Then I select the selection tool and click on the textured layer and drag it to the picture. You can see that now there are two layers in the layers pallette (bottom right):
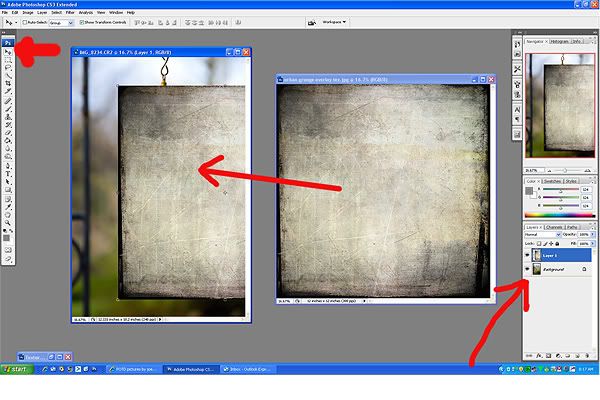
I can adjust the layer by moving it to where I want it over my picture. I chose not to have it stay in the original proportions...
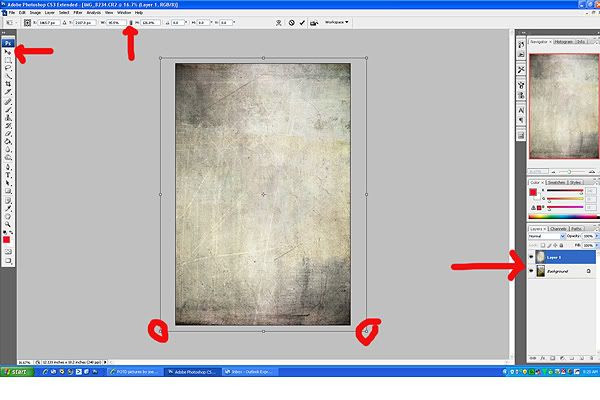
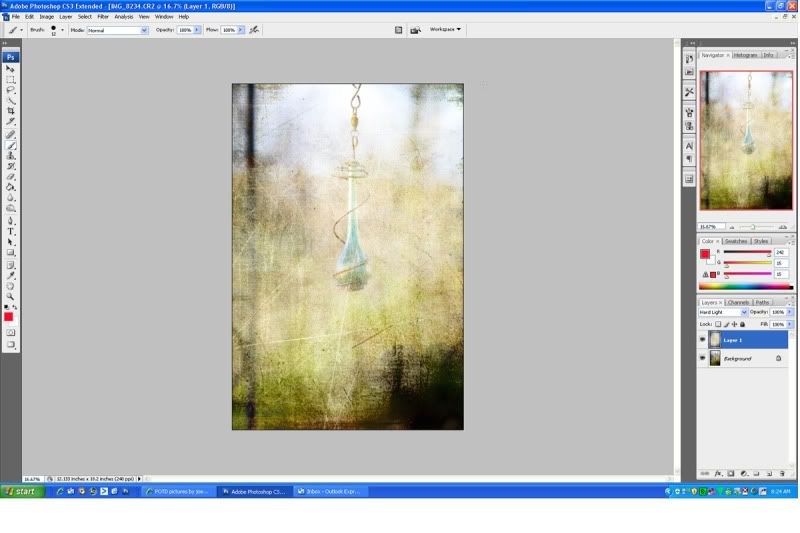
I then made sure the textured layer was highlighted in the layers pallette and then selected "Hard Light". (You will see a drop down menu and it will default with "normal")
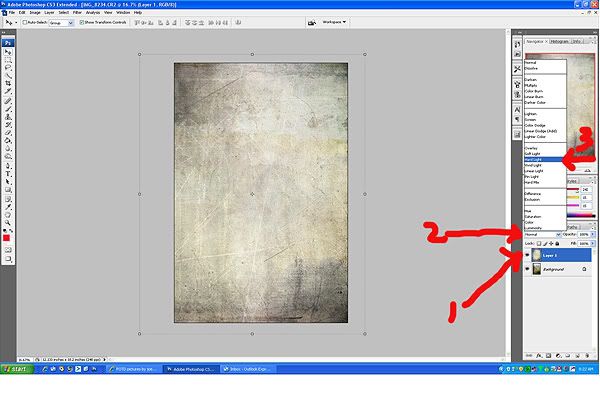
(1 - layers pallette, select the layer you are working on. 2 - change the layer from "normal" to "hard light". 3 - "Hard light" choice)
Then I select the selection tool and click on the textured layer and drag it to the picture. You can see that now there are two layers in the layers pallette (bottom right):
I can adjust the layer by moving it to where I want it over my picture. I chose not to have it stay in the original proportions...
I then made sure the textured layer was highlighted in the layers pallette and then selected "Hard Light". (You will see a drop down menu and it will default with "normal")
(1 - layers pallette, select the layer you are working on. 2 - change the layer from "normal" to "hard light". 3 - "Hard light" choice)
This makes the texture layer more transparent...
Then I use the eraser tool to erase part of the texture layer to reveal more detail in the original subject on the background layer...
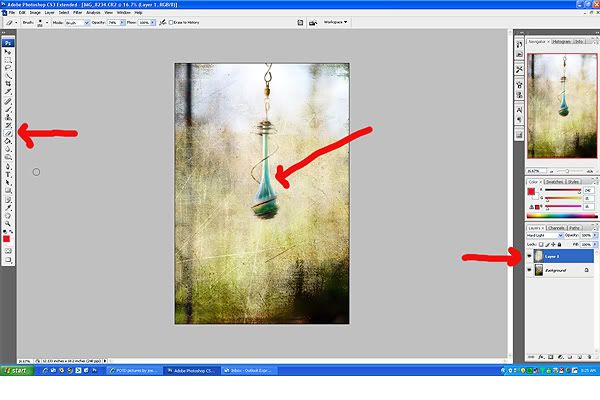
Then I can adjust each layer separately, the coloring, the saturation, etc... Just click in your layers pallette the layer you want to adjust.
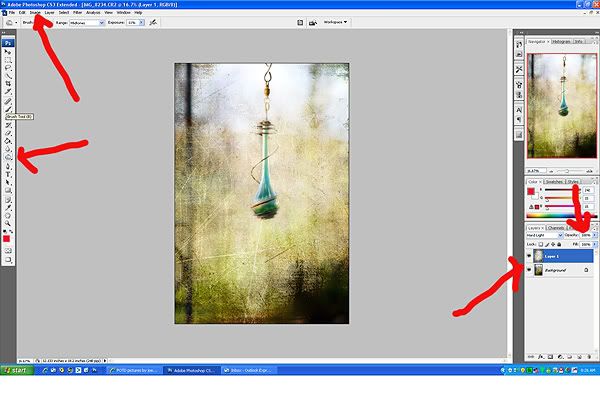
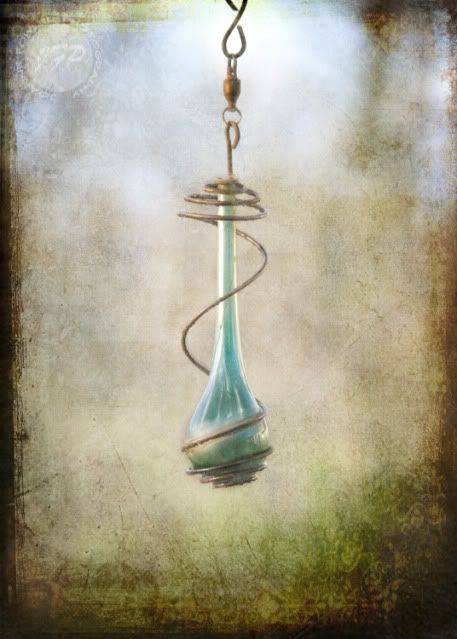
Here is my final product. Actually, this is one I did earlier but then decided to recreate it for this post. Have fun!
Then I use the eraser tool to erase part of the texture layer to reveal more detail in the original subject on the background layer...
Then I can adjust each layer separately, the coloring, the saturation, etc... Just click in your layers pallette the layer you want to adjust.
Here is my final product. Actually, this is one I did earlier but then decided to recreate it for this post. Have fun!
Sorry for the quickie hit and run post! Leave any questions in the comment section and I'll add more later!
Thanks for visiting!